What Mods/Changes Have You Done To Your 2015 or 2016???
#2831
Guess I should finally get around to posting what I have gotten done. 2015 XLT that I have owned for about 6 months now. The big thing with me is that all of the mods I do I try to do them so they are reversible when the time comes to sell the truck. At the same time they have to stand the test of time.
First upgrade was the headlights and Fogs, The halogen suck plain and simple. I have no intention on swapping out the housing for the ridiculous OEM prices much less the aftermarket ones so I just upgraded the bulbs. I use a company called VVME that I have used to the last 10+ years. 4000k HID in the driving lights only. I don't use my high beams "find out why later". Fogs were swapped out with 5000k Cree LED. I prefer Cree over any other brand as they are priced well and the Cree Factory is local to me. I adjusted the beams on both down some as I know they will cause issues to other driver, but in the end I don't really care. I get blinded by brand new cars with projector and LED's all the time when driving.
I purchased the truck off the lot so didn't have a lot of say in the package, it had everything I needed, Max Tow, No Leather, Spray in bedliner, No Navigation, Etc. Only thing it had I'm not to thrilled about is the chrome package. So I'm slowly solving that issue. Door handles where first. vinyl wrapped them in gloss black which is about as close as I will get to the Tuxedo Black paint.

Front and rear emblems where next. I purchased used ones on ebay for like $10 each. Removed the blue portions of them, filled in the holes with epoxy and sand blasted the chrome finish to give me a consistent texture to spray on top of. I then used Rustoleum Truck Bed Liner spray on both of them. If you ever use the stuff pay the extra and get the professional. The standard sucks and will peel right off. The professional is much better and cures harder. It does take a couple days for full cure. This gave me the recessed logo look I was looking for.

Since 2010 the taillight housings have been huge and honestly only look right on red trucks. Any other color the red plastic throws off things in the back. So I knew I wanted to black them out but at the same time not completely. Since I know I will not be blacking out the truck completly I wanted to give the back the same light/dark contrast as the rest of the truck would have between the chrome and black. So I decided to leave the backup light untinted along with the clear lines. Mixed up some clear and tinted it and I ended up with this which I think looks amazing on the back of the truck.

Light bar was next on the list and this was a tricky one. My 2010 had a bull bar and the 20" cree bar was mounted to that. I didn't want to go the route of the bull bar again but wanted to keep the LED bar low. After removing the lower grill and seeing it was one piece, I decided an Eco-boost lower grill was better as it was already open. Got one on eBay for like $30 and proceeded to measure and hack it up. Mounting the LED bar was interesting as there is nothing behind that lower grill on the 5.0. So I began fashioning a bracket. A single piece of flat steel running from one side of the frame to the other worked perfectly. I drilled out 4 holes in the frame rails and taped them out for SS bolts. Then mounted the LED bar to the plate. Installed it on the frame, marked out the areas on the lower grill than needed to be trimmed and slowly worked the grill till it fit perfectly. This is probably about as stock of a look as you will get.


Adding in switches for the LED's was another tricky task. Ford didn't leave a lot of good restate to mount things. I know with the switches I had that I was going to be cutting into a panel for it so I needed to be sure I made it look as stock as possible, or cut into a panel I can easily replace. I used outfitter switches that I had kept from my 2010. I picked them up from http://www.otrattw.net/. They are great swiches. Decided to mount them on the panel next to the steering wheel.

Stereo was pretty easy. I knew I was not swapping out the touchscreen as there was too much integrated into it. So I just needed to add a Sub and Amp. Memphis audio PR 150.2 mounted behind the seat, Audio signal comes from a PAC wired into the rear door speaker leads. Power for the AMP comes from the 120v inverter power feed. It was a good solid power source located right there in the rear. Has 12 constant and a remote turn on right there. No need to run any cables up front. The Memphis amp is rated way under the inverters wiring and I don't see myself using both at the same time so I'm good. The Sub is a 10" Kicker Comp mounted in a prefab wedge box. I just went to the Car Audio store and we went through all their boxes looking for one that fit. I added riser feet onto it so the sub fires downward. Upward was too boomy and soft. Down firing is nice and crisp. It doesn;t extend past the rear seat when folded down, I still keep the little storage area behind it and most never even notice it is there.

Last thing for now is adding in some ambient lighting. I came across the f150leds.com cup holdr rings and really liked how that looked. I watched their install video and saw what their supposed "rings" where. I didn't like how they just pushed the EL wire under the panel and wanted a better secure method. I order some EL wire and inverters. Pulled the center console panel off and used hot glue to hod the wire in place and prevent it from shifting. Wired it all up and it looks great!


I have a lot of plans for other interesting things in the future. I use my truck to tow my other car a lot to the track and shows so I won't be messing with ride height any. Mostly visual and lighting - Int/Ext. I like to fabricate most things myself, or purchase something as a base and modify it to work. I'm in the beginning process of doing full paint on my other car so work to the truck will be limited the next couple of months.
First upgrade was the headlights and Fogs, The halogen suck plain and simple. I have no intention on swapping out the housing for the ridiculous OEM prices much less the aftermarket ones so I just upgraded the bulbs. I use a company called VVME that I have used to the last 10+ years. 4000k HID in the driving lights only. I don't use my high beams "find out why later". Fogs were swapped out with 5000k Cree LED. I prefer Cree over any other brand as they are priced well and the Cree Factory is local to me. I adjusted the beams on both down some as I know they will cause issues to other driver, but in the end I don't really care. I get blinded by brand new cars with projector and LED's all the time when driving.
I purchased the truck off the lot so didn't have a lot of say in the package, it had everything I needed, Max Tow, No Leather, Spray in bedliner, No Navigation, Etc. Only thing it had I'm not to thrilled about is the chrome package. So I'm slowly solving that issue. Door handles where first. vinyl wrapped them in gloss black which is about as close as I will get to the Tuxedo Black paint.

Front and rear emblems where next. I purchased used ones on ebay for like $10 each. Removed the blue portions of them, filled in the holes with epoxy and sand blasted the chrome finish to give me a consistent texture to spray on top of. I then used Rustoleum Truck Bed Liner spray on both of them. If you ever use the stuff pay the extra and get the professional. The standard sucks and will peel right off. The professional is much better and cures harder. It does take a couple days for full cure. This gave me the recessed logo look I was looking for.

Since 2010 the taillight housings have been huge and honestly only look right on red trucks. Any other color the red plastic throws off things in the back. So I knew I wanted to black them out but at the same time not completely. Since I know I will not be blacking out the truck completly I wanted to give the back the same light/dark contrast as the rest of the truck would have between the chrome and black. So I decided to leave the backup light untinted along with the clear lines. Mixed up some clear and tinted it and I ended up with this which I think looks amazing on the back of the truck.

Light bar was next on the list and this was a tricky one. My 2010 had a bull bar and the 20" cree bar was mounted to that. I didn't want to go the route of the bull bar again but wanted to keep the LED bar low. After removing the lower grill and seeing it was one piece, I decided an Eco-boost lower grill was better as it was already open. Got one on eBay for like $30 and proceeded to measure and hack it up. Mounting the LED bar was interesting as there is nothing behind that lower grill on the 5.0. So I began fashioning a bracket. A single piece of flat steel running from one side of the frame to the other worked perfectly. I drilled out 4 holes in the frame rails and taped them out for SS bolts. Then mounted the LED bar to the plate. Installed it on the frame, marked out the areas on the lower grill than needed to be trimmed and slowly worked the grill till it fit perfectly. This is probably about as stock of a look as you will get.


Adding in switches for the LED's was another tricky task. Ford didn't leave a lot of good restate to mount things. I know with the switches I had that I was going to be cutting into a panel for it so I needed to be sure I made it look as stock as possible, or cut into a panel I can easily replace. I used outfitter switches that I had kept from my 2010. I picked them up from http://www.otrattw.net/. They are great swiches. Decided to mount them on the panel next to the steering wheel.

Stereo was pretty easy. I knew I was not swapping out the touchscreen as there was too much integrated into it. So I just needed to add a Sub and Amp. Memphis audio PR 150.2 mounted behind the seat, Audio signal comes from a PAC wired into the rear door speaker leads. Power for the AMP comes from the 120v inverter power feed. It was a good solid power source located right there in the rear. Has 12 constant and a remote turn on right there. No need to run any cables up front. The Memphis amp is rated way under the inverters wiring and I don't see myself using both at the same time so I'm good. The Sub is a 10" Kicker Comp mounted in a prefab wedge box. I just went to the Car Audio store and we went through all their boxes looking for one that fit. I added riser feet onto it so the sub fires downward. Upward was too boomy and soft. Down firing is nice and crisp. It doesn;t extend past the rear seat when folded down, I still keep the little storage area behind it and most never even notice it is there.

Last thing for now is adding in some ambient lighting. I came across the f150leds.com cup holdr rings and really liked how that looked. I watched their install video and saw what their supposed "rings" where. I didn't like how they just pushed the EL wire under the panel and wanted a better secure method. I order some EL wire and inverters. Pulled the center console panel off and used hot glue to hod the wire in place and prevent it from shifting. Wired it all up and it looks great!


I have a lot of plans for other interesting things in the future. I use my truck to tow my other car a lot to the track and shows so I won't be messing with ride height any. Mostly visual and lighting - Int/Ext. I like to fabricate most things myself, or purchase something as a base and modify it to work. I'm in the beginning process of doing full paint on my other car so work to the truck will be limited the next couple of months.
Last edited by gonzoInc; 09-01-2016 at 01:20 PM.
#2832
Member
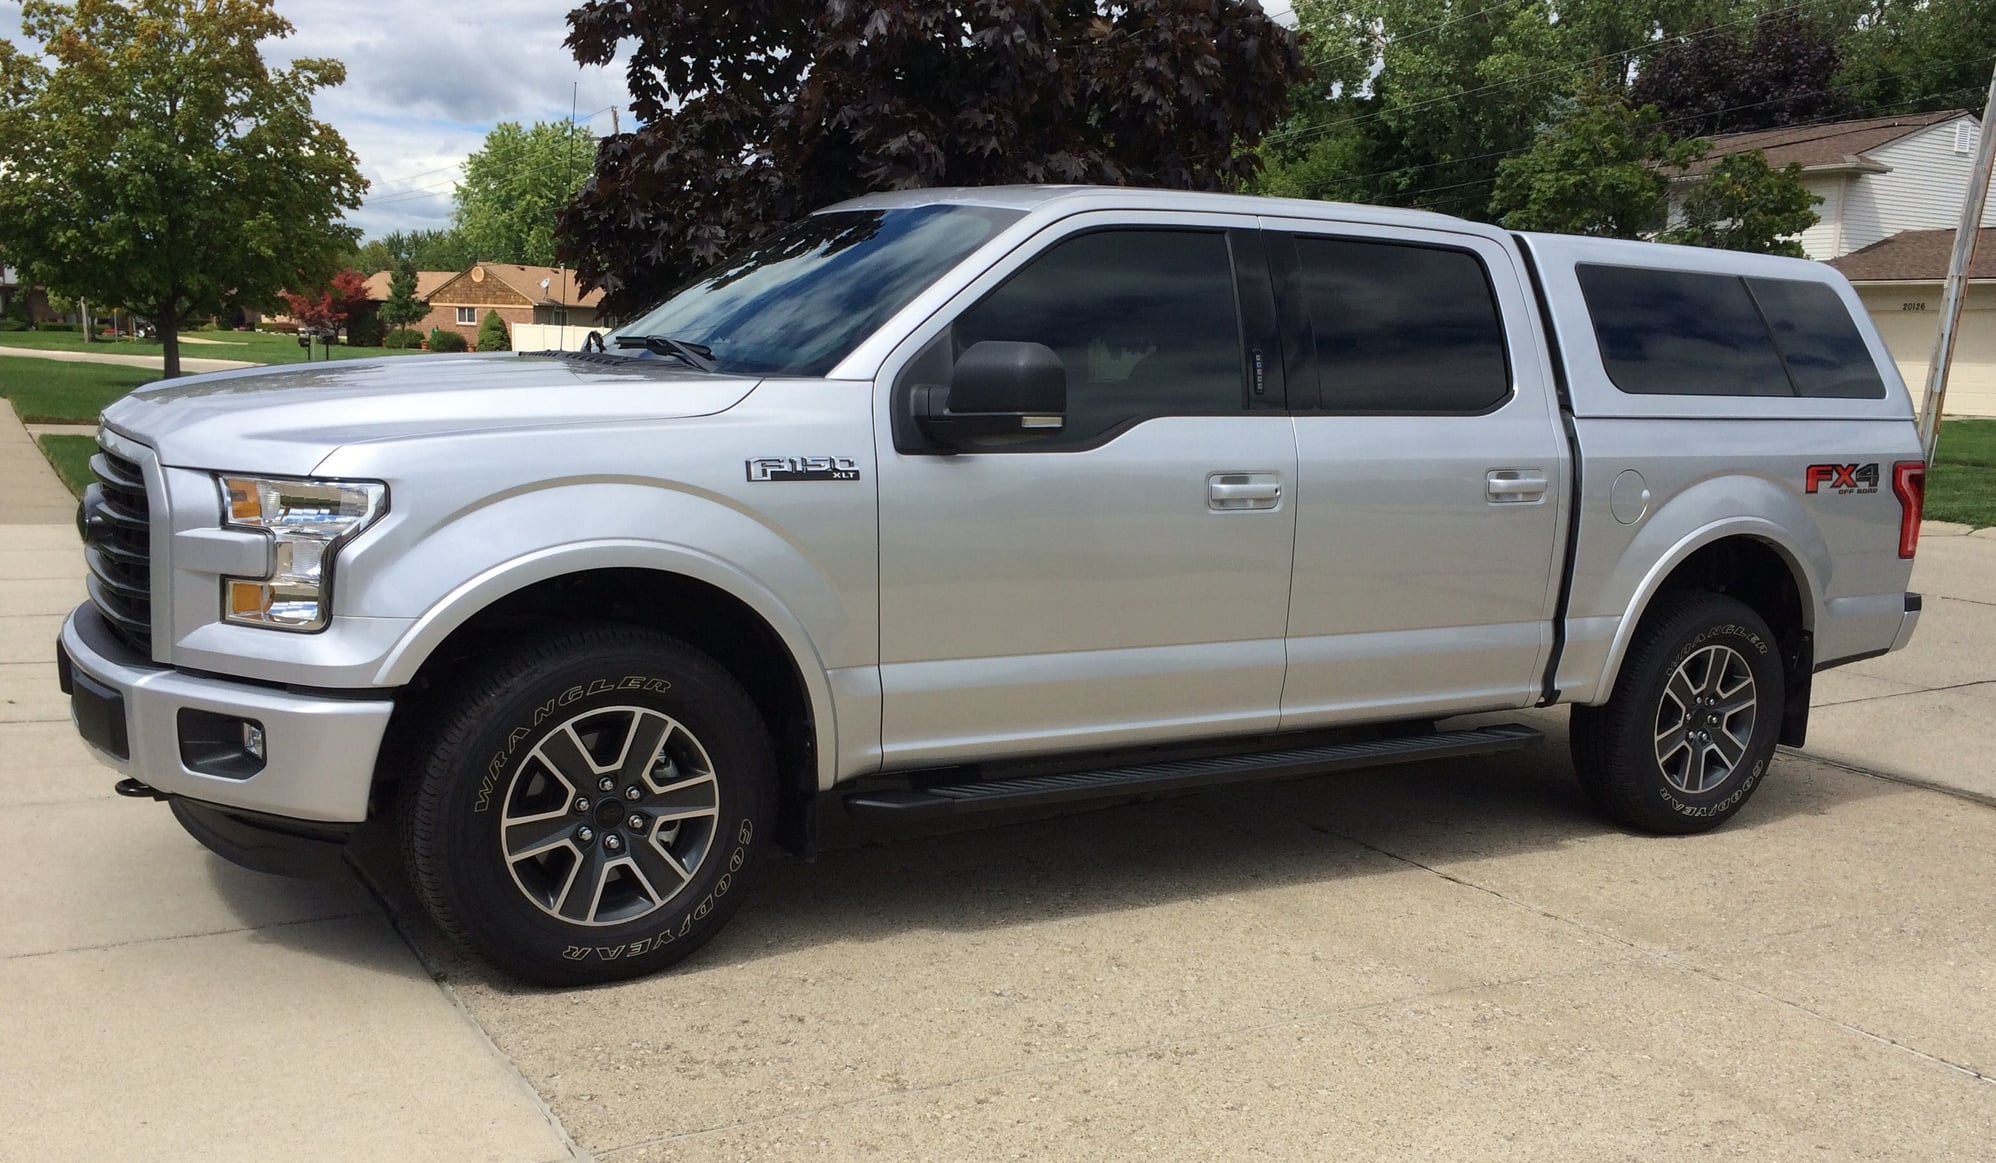
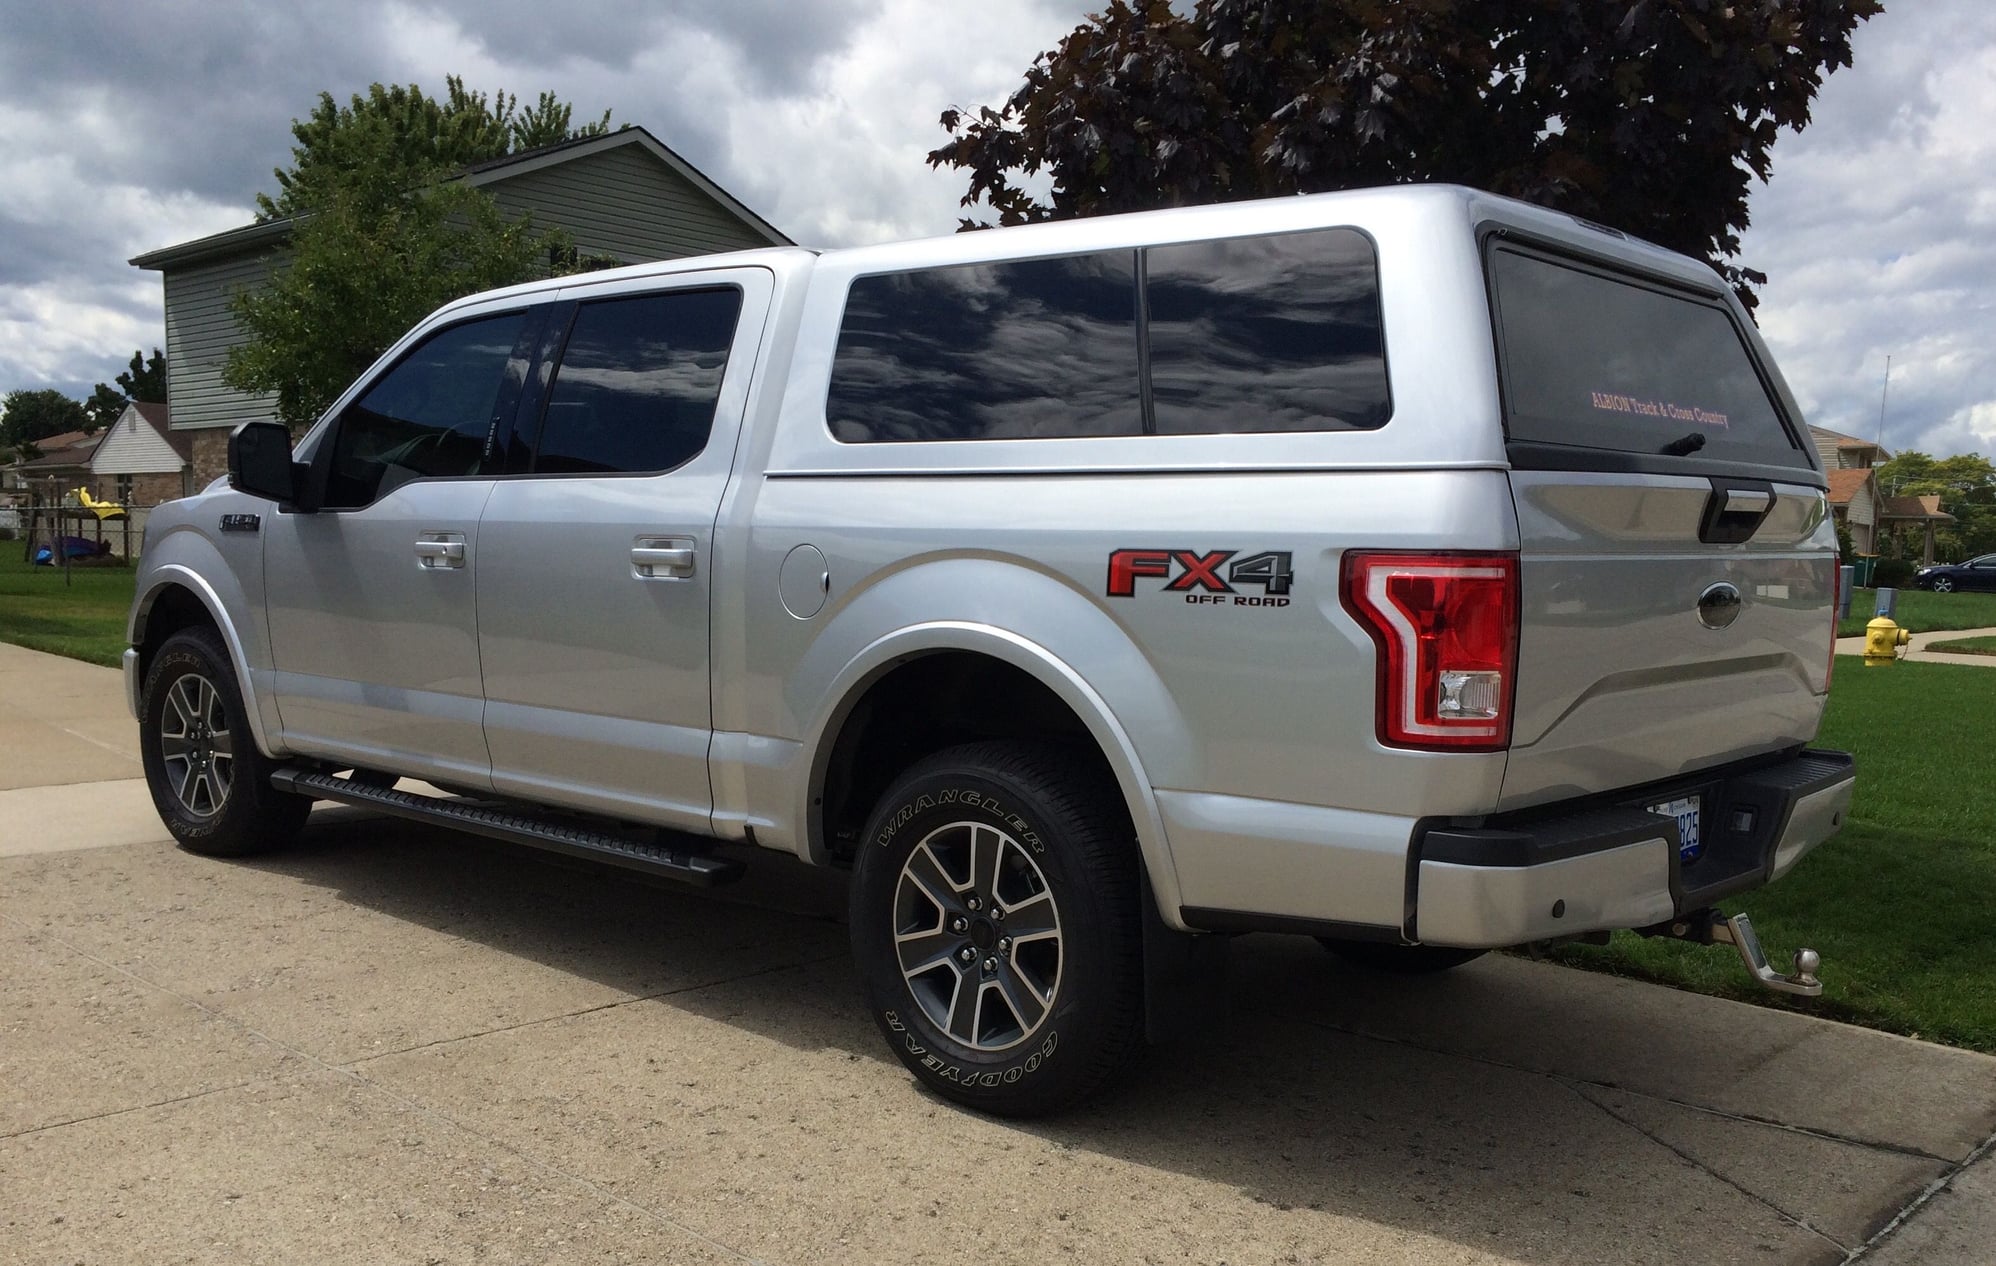
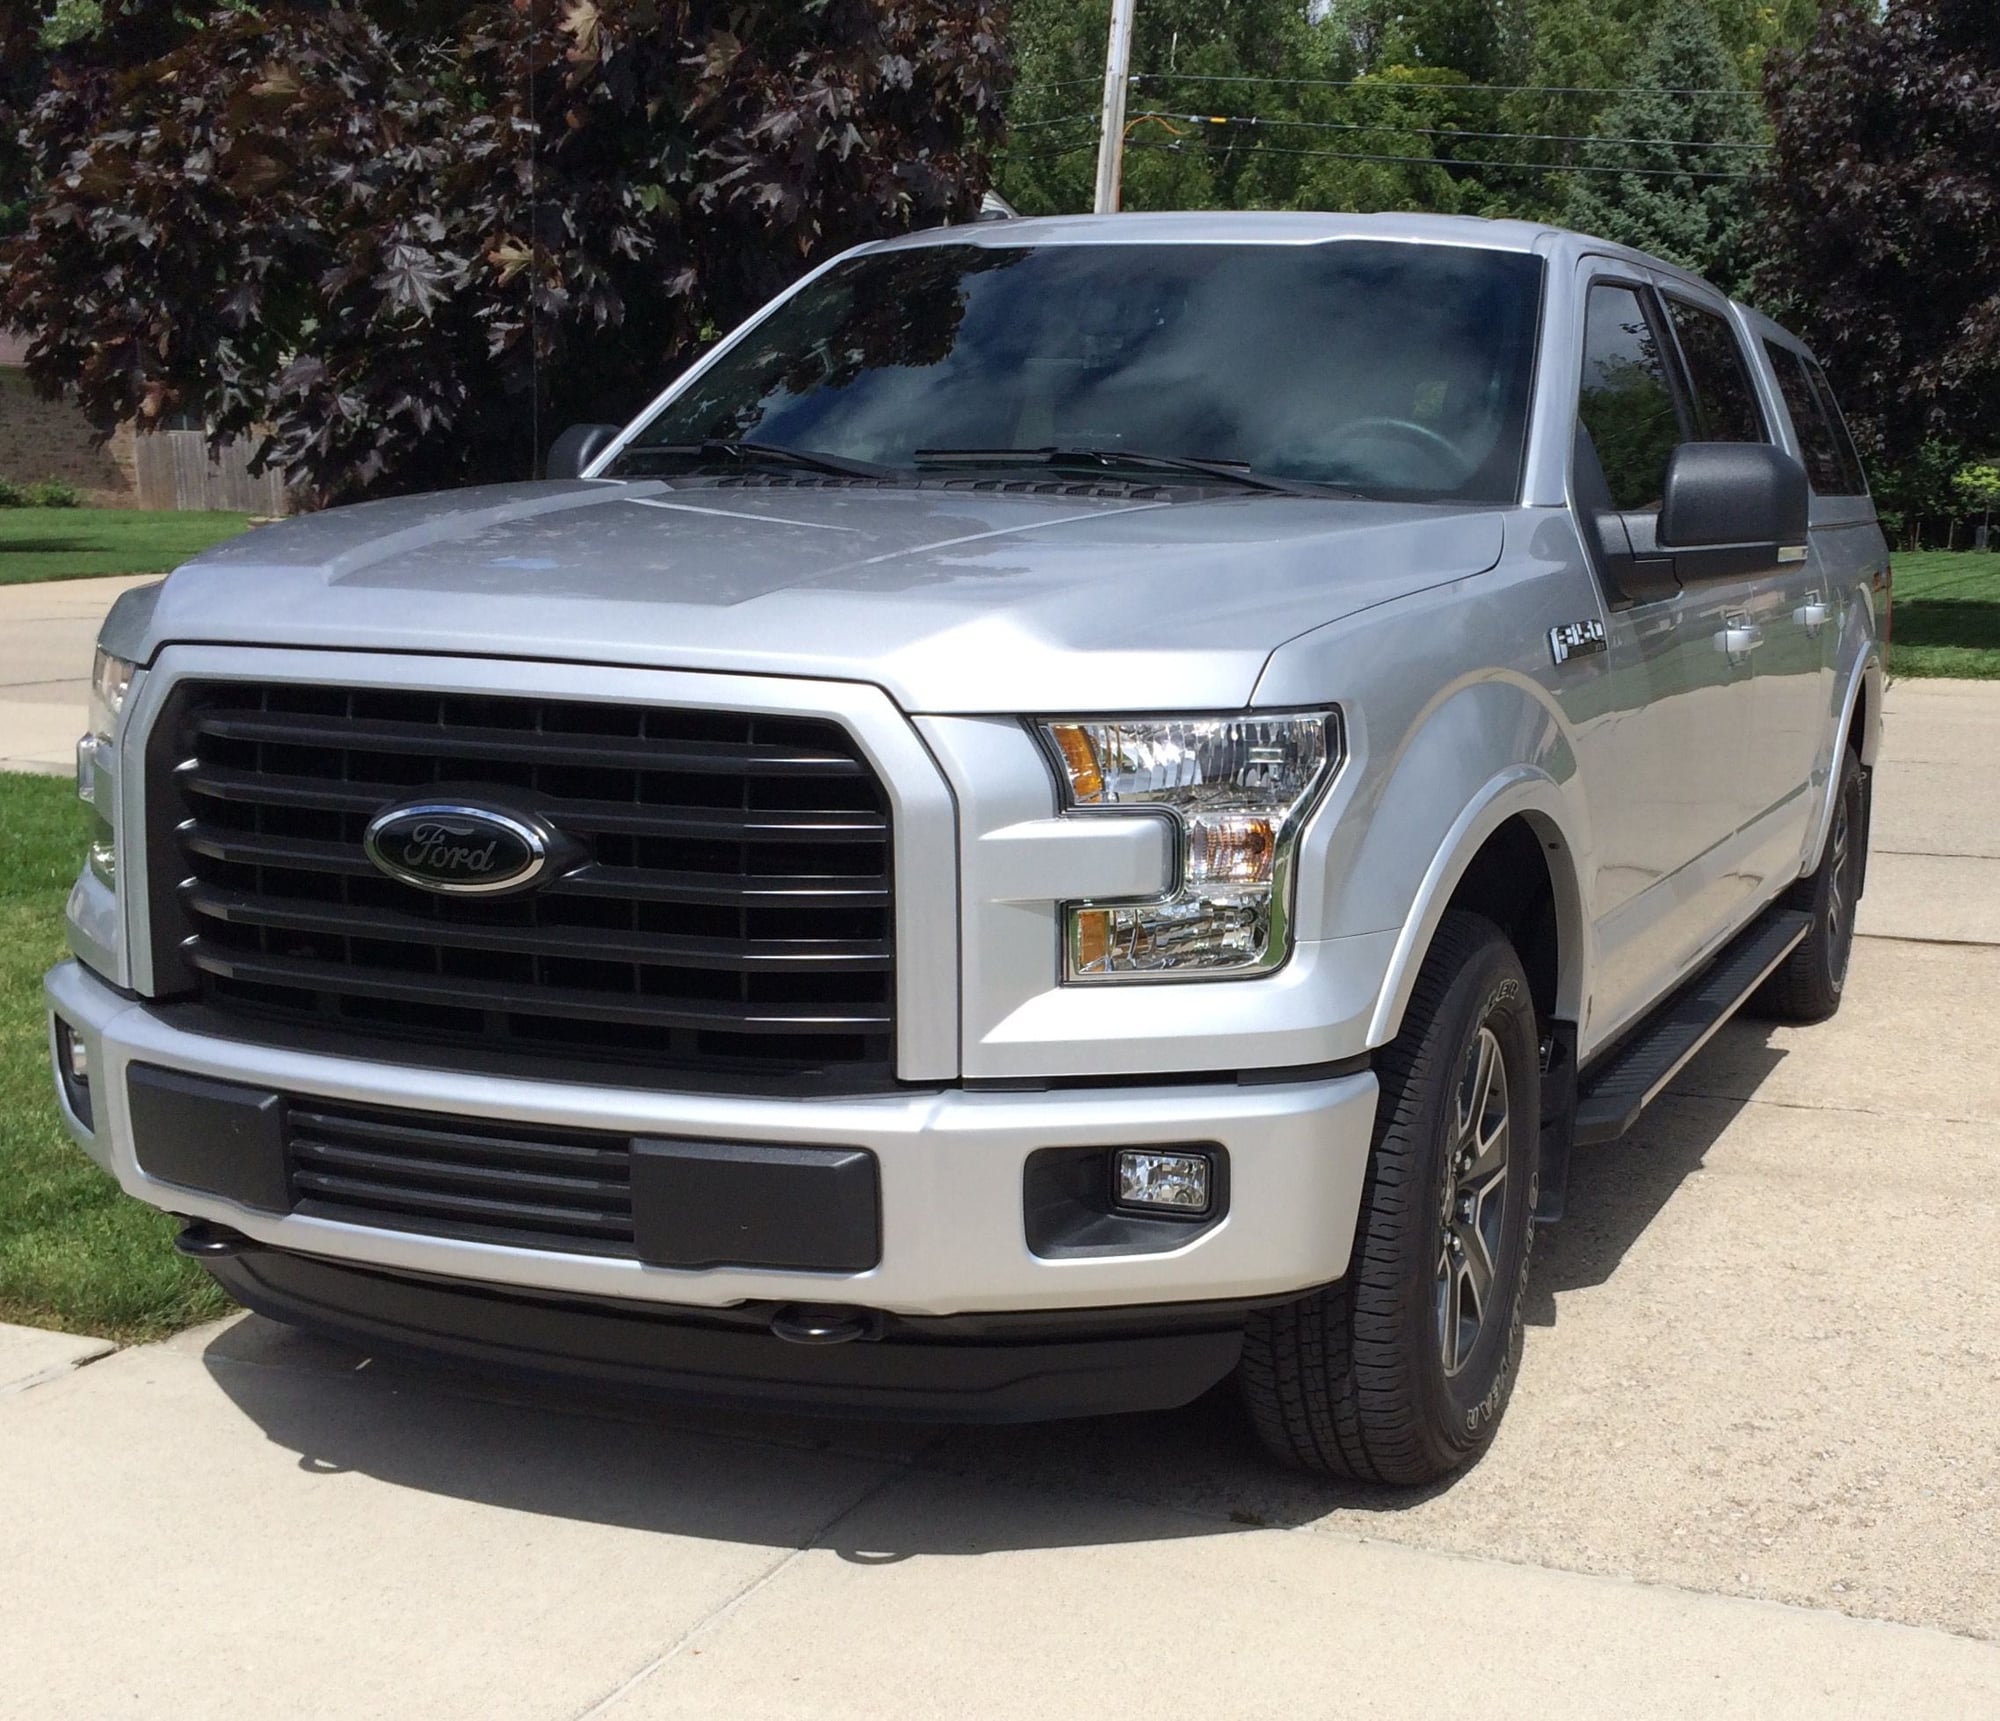
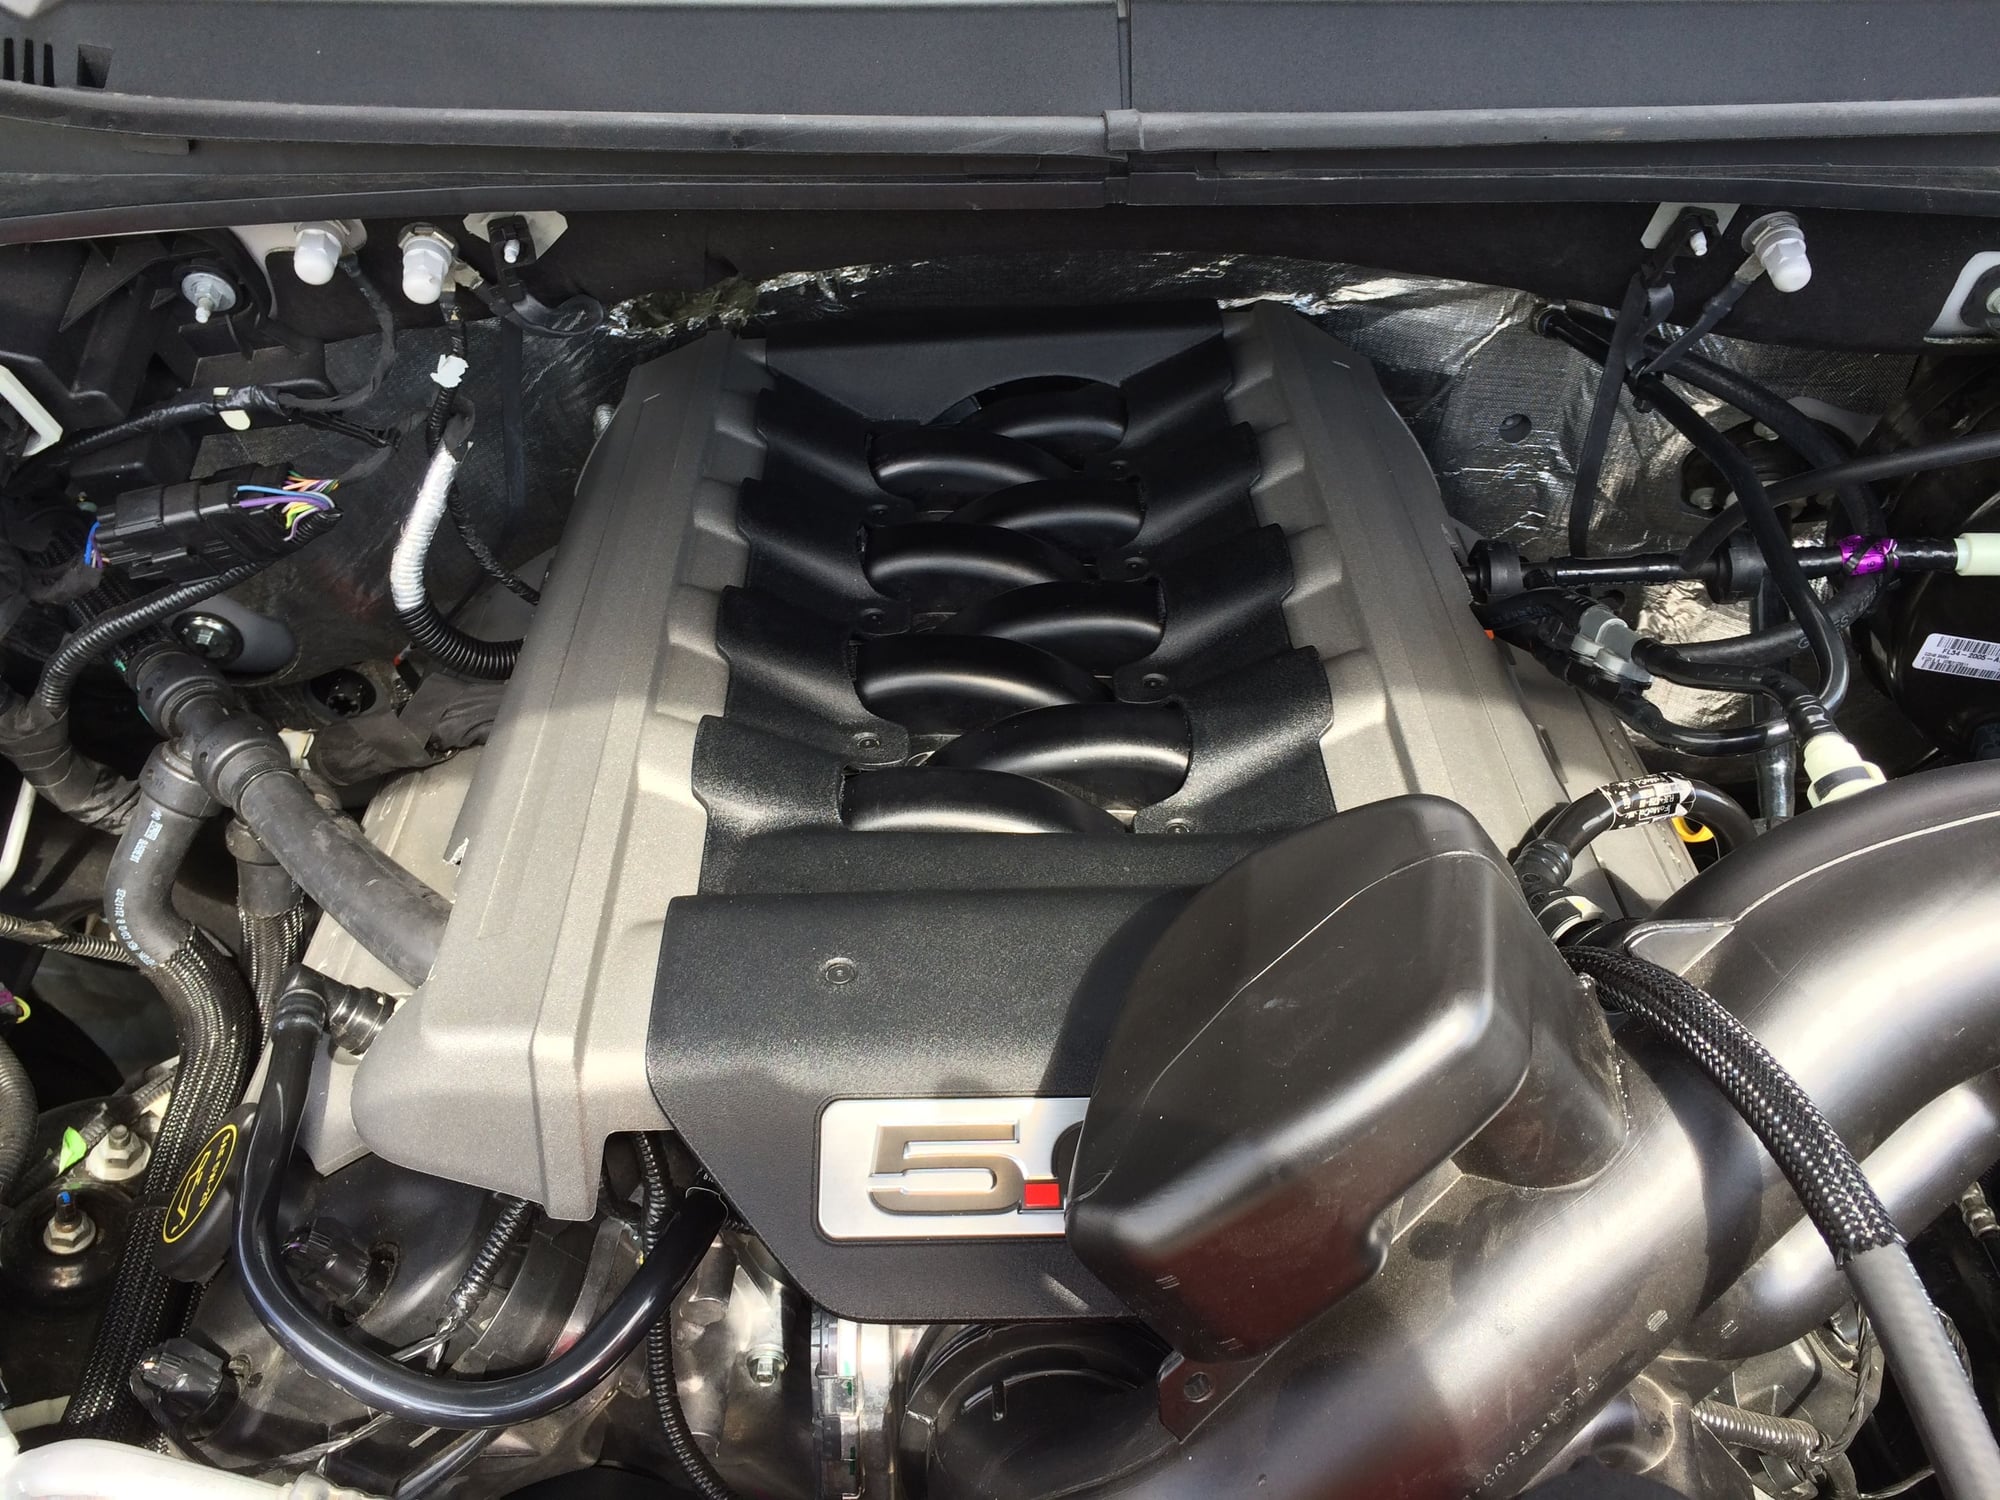
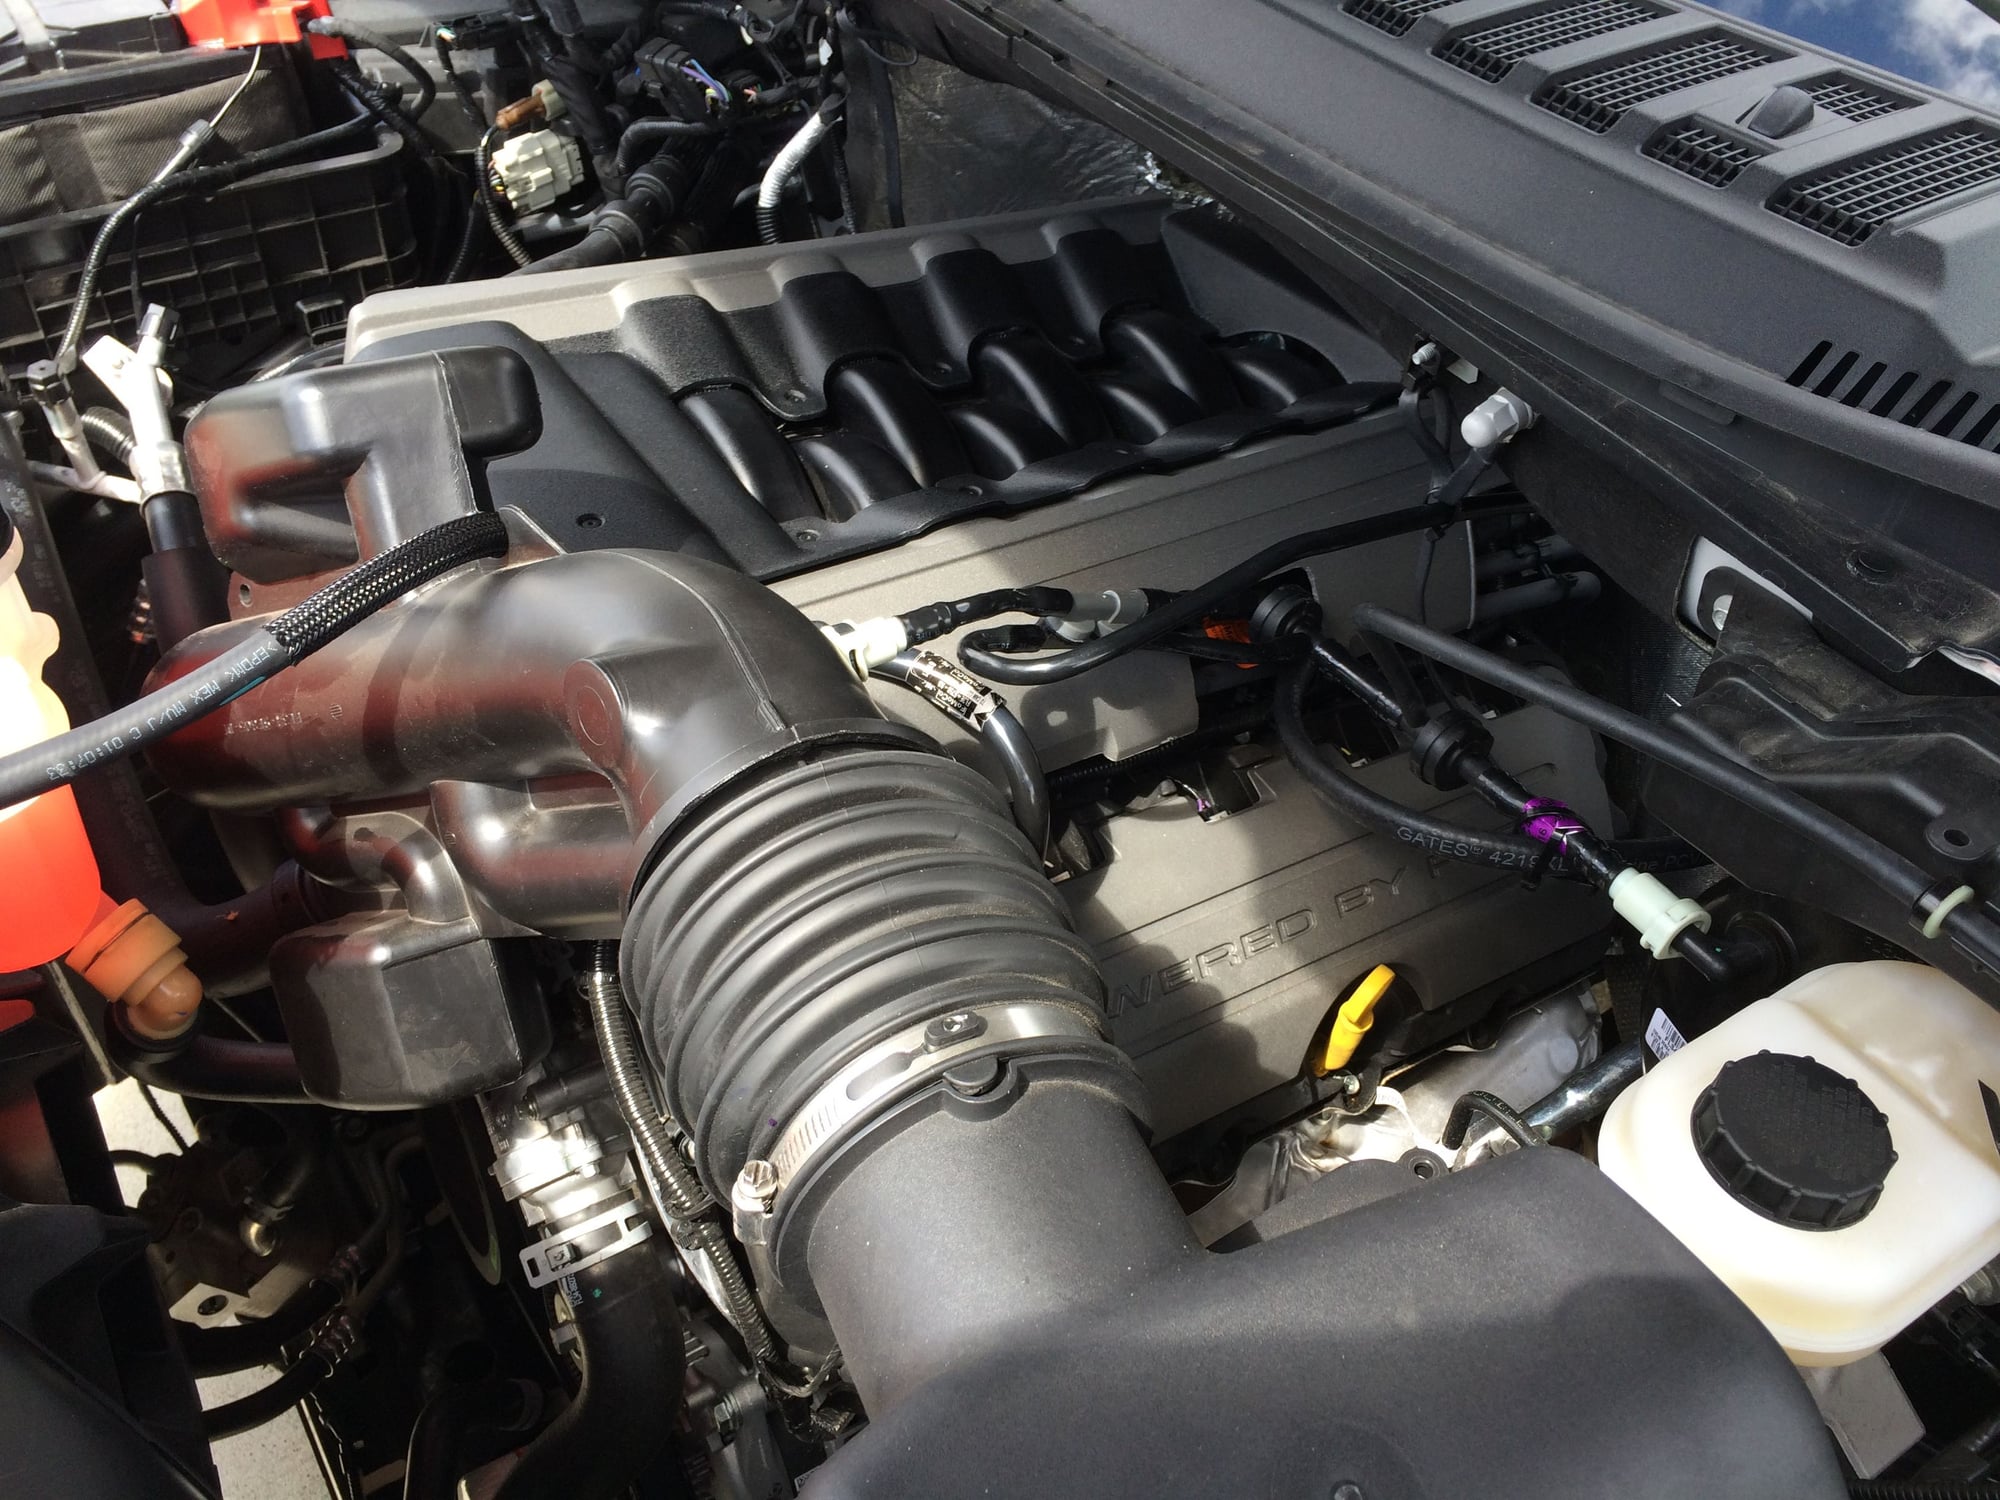
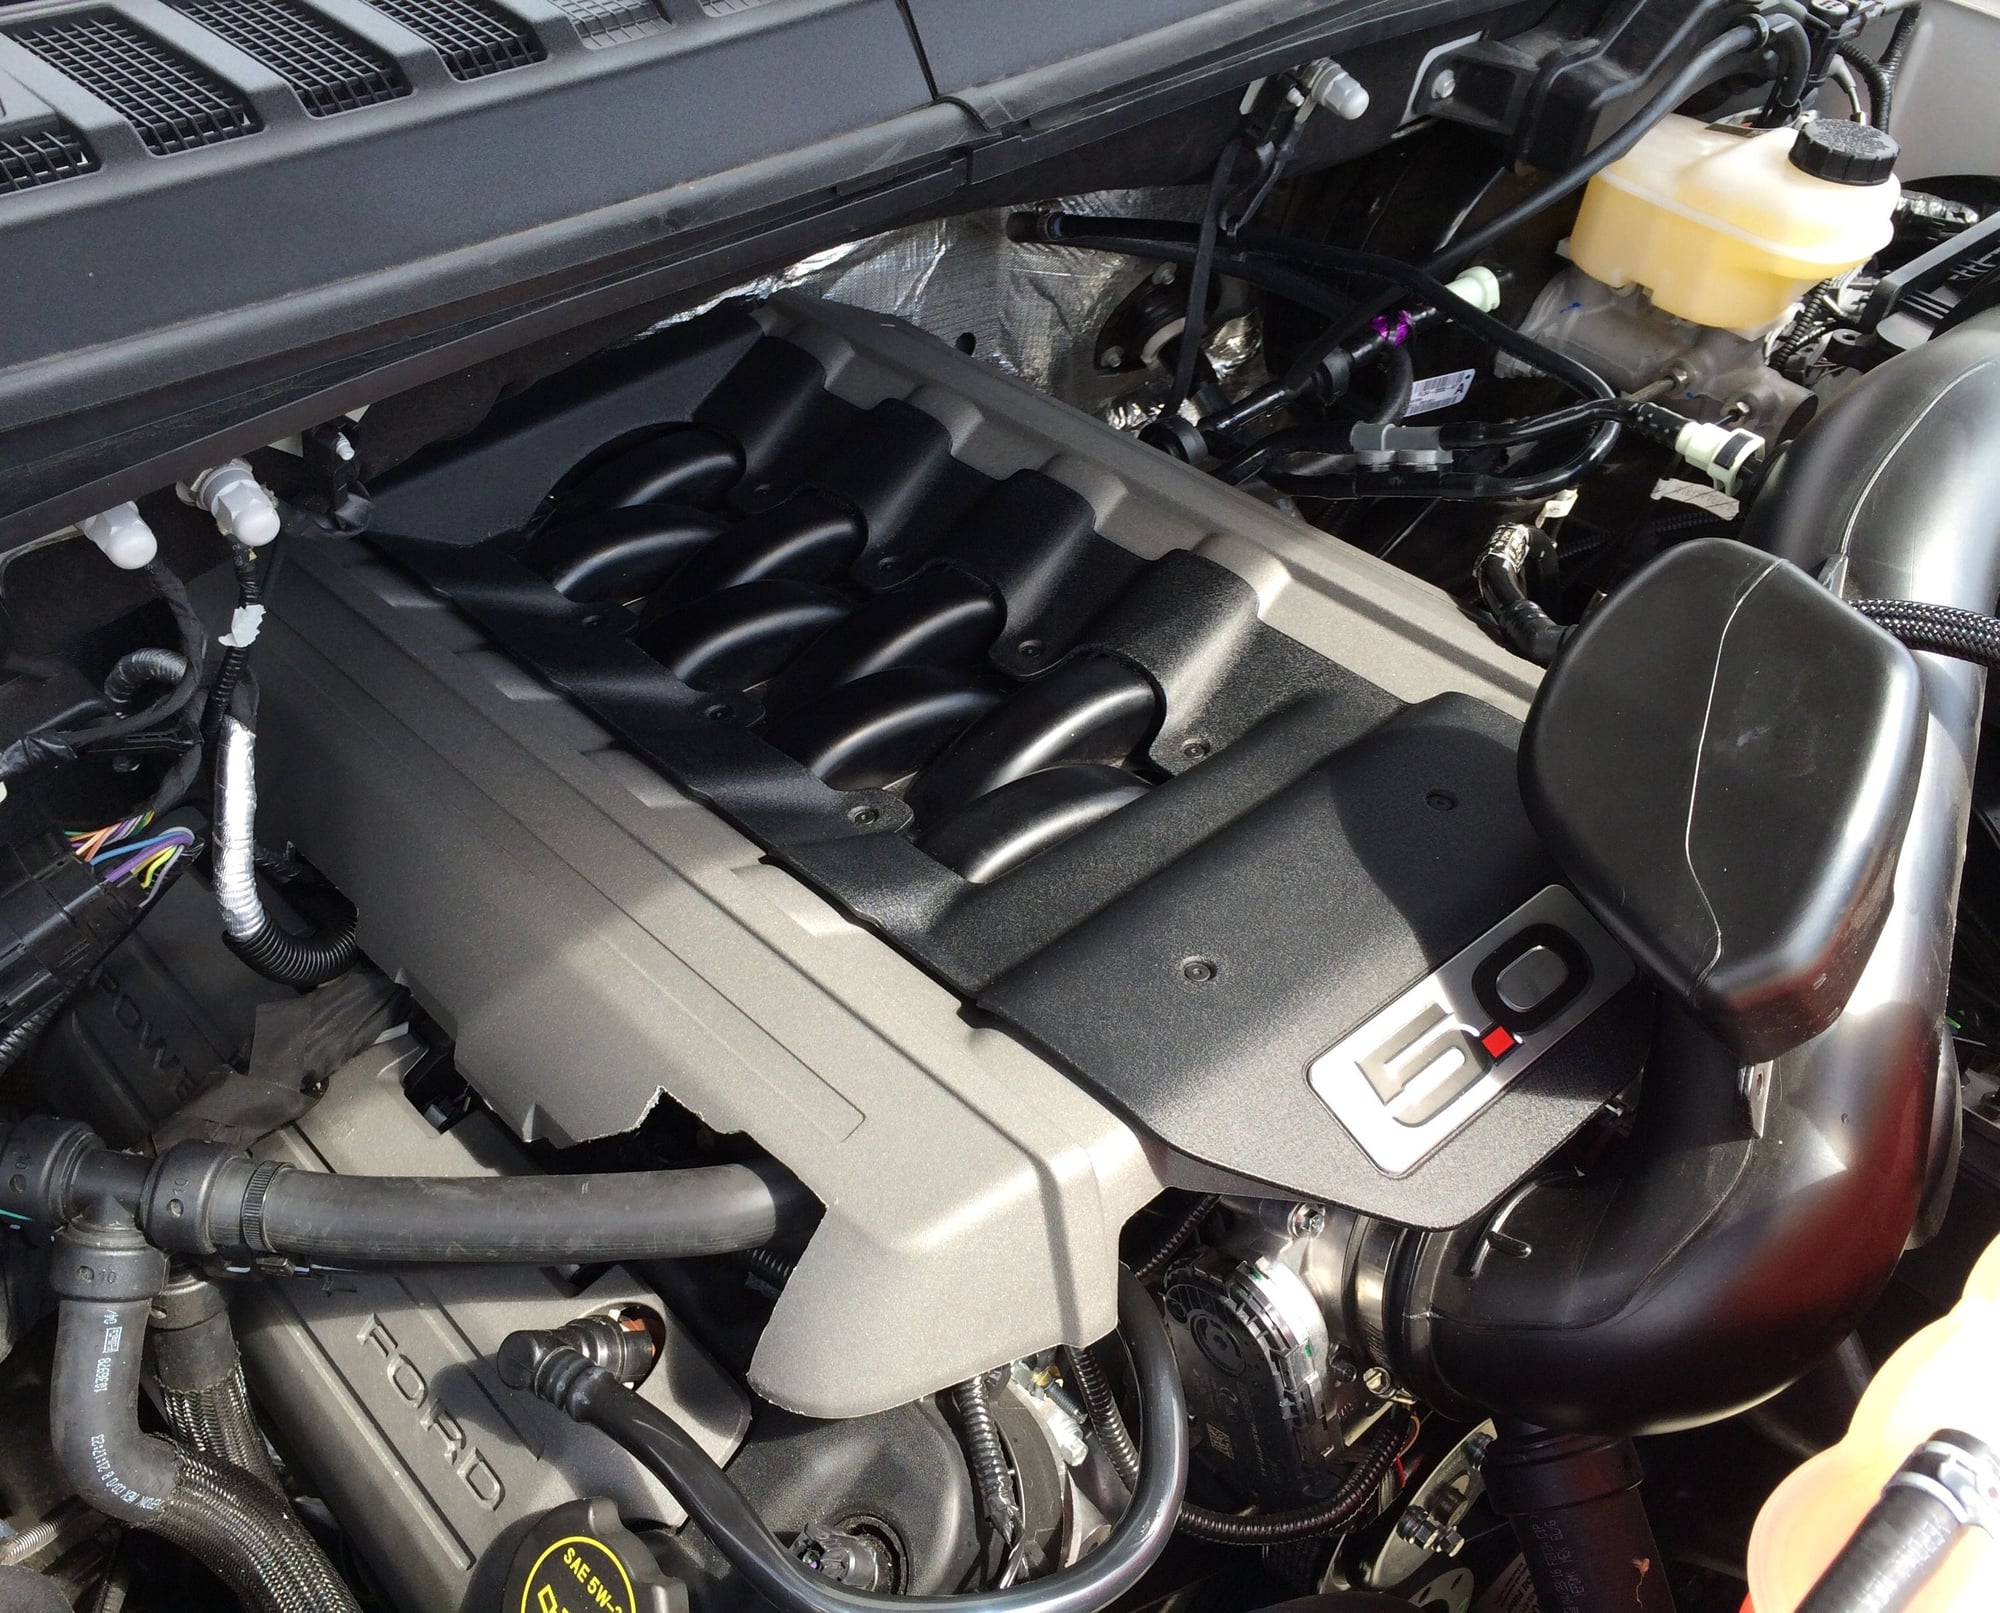
New to the forum, but I've been lurking for a few weeks. Thought it was time to say hello and share a couple of images too. Here's a list of what I've done so far:
Exterior-
ARE CX series cap
Bedrug
Weathertech mud flaps
Tint front windows 35
Vinyl overlays on rim center caps
Vinyl overlays on F&R Ford blue ovals
Debadged tailgate
Low Budget Stainless Gear clamp tailgate "lock"
Ford rear wheelwell liners
Inside-
Added 3x 12v PowerPoint on passenger side
Hardwired GPS & V1 wiring behind dash to center speaker area
Weathertech F&R floor mats
Underhood-
'15 Mustang GT coil covers
'15 Mustang GT engine appearance cover
Last edited by 90trunk; 09-02-2016 at 12:22 PM.
#2833
Senior Member
Originally Posted by Badas5
The intercooler/radiator fills the whole opening. A problem in Minnesota where we require front plates. Also I need to buy or make a screen for it so no large objects go in it and ruin it.
#2834
Last thing for now is adding in some ambient lighting. I came across the f150leds.com cup holdr rings and really liked how that looked. I watched their install video and saw what their supposed "rings" where. I didn't like how they just pushed the EL wire under the panel and wanted a better secure method. I order some EL wire and inverters. Pulled the center console panel off and used hot glue to hod the wire in place and prevent it from shifting. Wired it all up and it looks great!


#2836
Senior Member
I have 20s on mybtruck and they will be downsized to 18s (as coupled with new wheels ) with fatter sidewalls when they're worn-down.
#2837
Light bar was next on the list and this was a tricky one. My 2010 had a bull bar and the 20" cree bar was mounted to that. I didn't want to go the route of the bull bar again but wanted to keep the LED bar low. After removing the lower grill and seeing it was one piece, I decided an Eco-boost lower grill was better as it was already open. Got one on eBay for like $30 and proceeded to measure and hack it up. Mounting the LED bar was interesting as there is nothing behind that lower grill on the 5.0. So I began fashioning a bracket. A single piece of flat steel running from one side of the frame to the other worked perfectly. I drilled out 4 holes in the frame rails and taped them out for SS bolts. Then mounted the LED bar to the plate. Installed it on the frame, marked out the areas on the lower grill than needed to be trimmed and slowly worked the grill till it fit perfectly. This is probably about as stock of a look as you will get.


#2838
Not much of a mod but something pretty useful.
Attachment 446043
Smart and easy magnetic mount. Heavy duty magnet to hold a iPhone 6 Plus. Doesn't block vents which is a plus in my book.
Attachment 446043
Smart and easy magnetic mount. Heavy duty magnet to hold a iPhone 6 Plus. Doesn't block vents which is a plus in my book.


