When you click on links to various merchants on this site and make a purchase, this can result in this site earning a commission. Affiliate programs and affiliations include, but are not limited to, the eBay Partner Network.
Ever since I installed the Extang MaxSeal Tailgate Seal, opening the tailgate has been a PITA, not only with the difficulty in unlatching it, but the occassional glitch where my Power Tailgate Mod would either not fully unlock, or actually relock the latch. It never really worked the way I wanted it to, like when I originally performed this mod eons ago on my 2009. The actuator I used back then had sufficient throw to reliably lock and unlock the latch every time, and had a thick, heavy duty mounting bracket. With my 2011 and now 2013, I looked high and nigh for a similarly built actuator kit, but none of them had the longer throw, and they all came with flimsy brackets. Besides, I never really trusted the clamp method of attaching the actuator rod to the latch mechanism using tiny screws that were almost impossible to tighten completely due to the cramped space:
With my Power Tailgate Mod now completely unreliable, I decided to bite the bullet and buy the $90 purposefully built Pop & Lock:
The customized bracket completely elimates potential points of failure and slipping from the DIY setup:
When I finally cracked the tailgate opened, I was met with complete failure at all points I mentioned:
The flimsy bracket broke in half completely and the screws worked loose holding the actuating rod:
The break in the bracket probably happened from all the offroading vibration. Luckily for me, the actuator on the Pop & Lock used bullet connectors, just like my original actuator, so it was a plug-n-play scenario and I only needed the main Pop & Lock assembly:
Install required just one nut to be removed and two washers stacked on the studt:
Unfortunately, since I have the man-step, it slides into square tubing welded inside the tailgate leaving no room to squeeze the Pop & Lock assembly as-is; I had to remove the actuator, slide the bracket then actuator into the tailgate cavity, then reattach the actuator:
I fit the assembly onto the stud, reattach the nut, and plugged in the wiring. Testing with the remote, everything worked perfectly:
Before buttoning it up, I inspected the wiring and mercury switch for the bed lights:
I wired the switch in series with the cargo light and placed it an angle so that the bed lights only turn on when the tailgate is open:
After adjusting the tailgate latch rods and striker, opening the tailgate is much better, though still requires a good pull fully upwards on the handle:
To really fix the hard tailgate opening, I would need to adjust the driver's side pivot mount; a project for another day...
impressive to do all that yourself. Are you a mechanic?
Naw, but I've been wrenching on cars since enrolling in an auto shop class in high school back in 1982, working on my first car ever, handed down by my father: 1966 Mustang notchback (coupe), 289 2bbl, 4-speed C4. It was a rust bucket and needed TLC to get it to the bling Street Rod I envisioned for it. From this, I learned to rebuild suspensions, engines, axles, interior restoration, electrical, welding, body panel replacements, body work and paint. (BTW, many years later I sold this restomod Mustang with a swapped 351W and the buyer totaled it several months later.)
I graduated to high RPM V8's and twin turbos driven by the thirst for more speed and power.
Then I got into trucks.
Originally Posted by Elkmtb
Also it seems like Raptor bumpers would give you better departure/approach angles? but maybe I missed that somewhere in your post.
Raptor front bumpers will not fit regular F150's as they are too wide. Others have bolted them on and used fender "flares" (ala Bushwacker) to make up most of the difference, but the bumpers still extend past them:
These "flares" don't increase clearance at the footwells at all, however, which is where my 35's are rubbing at full lock (and heavily while in reverse at only partial lock).
Armored bumpers are just too heavy for my liking; heck, adding 200 pounds of winch has now caused my suspension to bottom out on simple street crossing gutters. I'm now forced to look at upgrading to heavier springs on my Kings.
But that may still not solve the grating rubbing with 35's and 2.25" coilover preload. Since my priority is to keep overall height manageable to fit parking garages, my only recourse is with a full Raptor-style mid-travel conversion. The biggest headache would be flaring out my 6.5' bed. I could bond on aftermarket fibergass flared bedsides, or graft on steel Raptor bedsides and blend the front portion further forward since my bed is a foot longer than a Raptor's.
I like the bed lights on a mercury switch, that's a nice idea - i'd need to first have bed lights before i could use that one though
This was one of the very first mods I did to the truck when I got it. I had a brand new in-the-box OEM Ford Cargo Management System side rails, front header bar, and load bar that I had bought long ago that I was planning to cut down the side rails to fit my 2009 5.5' bed but when that was sold, it collected dust in the shed.
When I got the 2013 with 6.5' bed, I discovered Ford discontinued adding the factory-installed bed side wall backing plates for the CMS (but kept the T-slots and top edge screw holes up on the bed rail) and had to build my own backing plates out of 2"x3/8" steel bar, drilled, tapped, then powder coated. These had to attach from inside the bedside cavities so I had to figure out a way to get them up there: I fished a string from inside the bed through the drilled holes down to the ground, loop it into the center hole I drilled and tapped into the backing plates, then pulled it up and aligned the two mounting holes into position:
I secured the backing plates to the bed using stainless steel flat-head screws located in between the two mounting bolts. This allows the CMS rails to easily be removed later with the backing plates remaining in place.
During install, I also wanted bed lights but at the time, I didn't have a tonneau cover and didn't want to place the LED strips anywhere on the face of the side rails or header bar which may interfere with the adjustable cleats or get damaged by cargo; my only choice was to stick them on the backsides of the side rails and header bar, which limited their ability to illuminate the contents of the bed sufficiently, though it was better than nothing on a dark night.
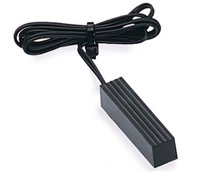
As I didn’t want these lights to turn on with the cargo light unless the tailgate was down, I searched for different methods of accomplishing this: the most common solution was using a rocker switch. But I wanted an automated solution, so investigated a momentary push-button. I couldn’t really locate an ideal spot that would press up against the face of the tailgate, and I was concerned about the protruding button getting whacked and damaged. Magnetic switches wouldn’t really fit in the tight confines between the bed and tailgate, so that left tilt-switches as the best option for me; specifically, an ECS Mercury Tilt Switch, available on Amazon for $5:
Now that I have a tonneau cover in place, I’m contemplating installing LED strips along the bottom of the tonneau cover rails for better lighting after I switch to a BAK Revolver X4 which would be compatible with my still-to-be-built-and-delivered Xtrusion Overland Bed Rack.
EDIT: Just as I posted this, I received the first partial delivery of the columns and main support bars for the XTR1 modular bed rack and couldn't wait to tear open the box...
Huh, i didn't even know about the CMS, looks pretty sophisticated.
Did you get your truck new? Just looking at your stripper pole and realising mine has a worn look to it
Shame about the kit that arrived being wrong, what is it again? related to the new tonneau?
A) It was optional, and a bit spendy for all the accessories and additional cleats.
B) It was only available for the 6.5' bed; not the more common 5.5', and the rare 8' beds.
C) With the CMS rails, you could no longer attach bed rail accessories, such as toppers, work racks, and bed racks that rely on pinch clamps. The only company that offered CMS compatible tonneau covers was (and still is) BAK Industries.
I feel if Ford made it for all bed lengths, and maybe standard equipment at least on the 6.5 beds, I think it would have been a success.
Originally Posted by [F2C]MaDMaXX
Did you get your truck new? Just looking at your stripper pole and realising mine has a worn look to it
Bought it used 2 years ago and had the pole Line-X'd when I refreshed the bed as it, too, was all gashed up from loads dragged across it. I upped for the UV "gloss" option to yea, make it look nice and new all the time!
Originally Posted by [F2C]MaDMaXX
Shame about the kit that arrived being wrong, what is it again? related to the new tonneau?
I ordered the XTR1 Bed Rack from Xtrusion Overland. Xtrusion Overland designed their rack mounting brackets to be tonneau compatible as then fit under typical cover rails and use a bed rail pinch clamp, or for the Retrax XR's, attach directly onto the XR's accessory track.
However, as with all sloped bed racks, hard folding tonneau covers won't be able to open up fully as they would hit the upgrights of the bedrack; a sliding or roll-up tonneau is necessary to gain top access to the bed. As I currently have a BakFlip MX4, I will be swapping in a roll-top BAK Revolver X4 (I don't want to lose valuable bed space to a canister-based retractable cover).
Anywho, as you can see from the XTR1 photo, I wanted all my aluminum T-slot tracks to be powder coated in black (optional) to match my truck. Now I've got to make a call to Alan (the owner)...
After changing out my rear bumper with the Raptor donor and doing a light check, I finally noticed the ****-yellow license plate bulbs. It was time for an upgrade and I selected those from F150LEDs:
This are really pricey at $30, but I felt at the time it was worth the cost because it was the only bulbs that faced "out" to better illuminate the license plate, and it definitely servced aces in that department:
Hmm... Maybe a bit too bright for my taste; I only wanted accent lightning, not a spot. It wasn't until l I backed up one night and gandered at the backup camera and discovered just how truly bright it really was as it washed out the bottom portion of the screen:
These F150LEDs bulbs definitely have superior light direction from its design, but personally, I would not recommend these backup LEDs; definitely stay away because of the price unless you truly want the brightest license plate bulb on the market. Certainly my intent was not to make it easier to read my plate at night, but to just get rid of that yellowish haze from stock filament bulbs. I guess I'll keep looking...
Anyone need license plate LEDs? Used very little...
A rock chip thrown from the rear tire, perhaps? How could that possibly happen... whatever, it definitely triggered my OCD'ness. And then I saw this...
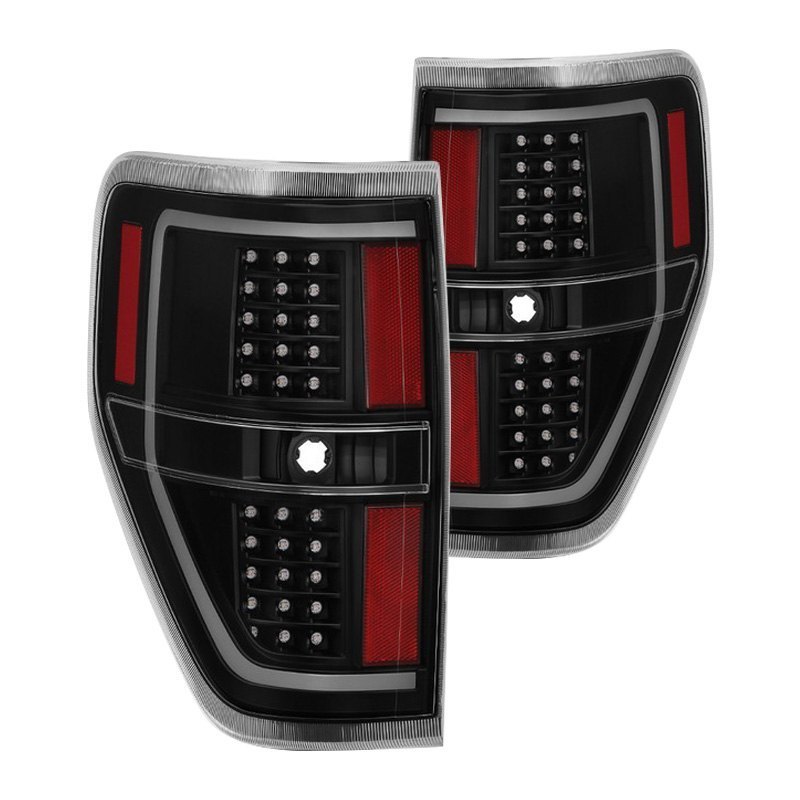
Did someone smack my taillight just enough to cause the top edge to break? Well, it's spilt milk now, so I just needed to replace it. LED bulbs do make the tails brighter, but there's no wow factor in that it still looks stock because it is. Our 12th Gens are hitting 13 years and two generations old since their initial release in the Fall of 2008 so to change it up a bit, I contemplated perhaps a true, full-on LED tail light ala aftermarket, such as these fiber optic Spyders:
Previously there were no aftermarket tail lights that had a chrome-like edge to blend in with my Platinum tailgate applique; aftermarket tail lights were either all black, all red, or all chrome. These Spyders were the first I've seen with a chrome-like edge and black lens body, however, these aren't available yet: Target release date is September 14th.
In the meantime, I got a brand new Ford tail light on eBay for one Benjamin
Uh huh, me likey sparkly new, and what's clearly noticeable here is the slight yellowing of the edges...
The protective foam pads left a sticky mess, which Goo-B-Gone was able to cure...
So I did a similar tailgate seal, but I also inserted some fuel tubing into the bottom seal to make it more....sealable?
Anyways, thought the DeeZee tailgate assist was the issue for the hard unlocking of the tailgate (relocated the rivet to a different location)... but it makes sense it would be the seal.
Have you found a fix for that? Or are you just dealing with the quick hard pull to open it up?
Wasn't sure if adjusting the latching bar was the ultimate fix or just something that helped a bit.
 05-17-2021, 04:51 PM